Historia sorprendentes
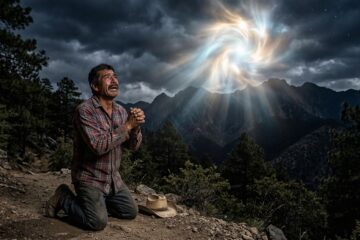
El Misterio del Monte: ¿Ángel o Visitante? La Verdad detrás de la Luz que me Cambió la Vida
Si vienes de Facebook buscando respuestas sobre esa presencia que me encontré en la montaña a las tres de la mañana, has llegado al lugar indicado. Sé que el relato te dejó con la duda Leer más